To find the best WiFi channel for your router, scan your local area with a WiFi analyzer, pick the least crowded non-overlapping channel, then set that channel in your router settings instead of Auto. On 2.4 GHz that usually means choosing between channels 1, 6 and 11. On 5 GHz it means picking whichever block is quietest around you.
The whole job takes about ten minutes, and you do it from a phone or laptop already connected to the network. No new hardware, no technician. The only thing that changes for most people is a dropdown in the router admin page.
Table of Contents
- The Five Steps, in Order
- What You Need Before You Start
- How to Find the Best WiFi Channel Step by Step
- Step 1: Check Your Current WiFi Channel and Band
- Step 2: Measure Nearby WiFi Congestion
- Step 3: Test a Less-Crowded Channel
- Step 4: Save the Channel and Verify the Change
- Common Mistakes That Ruin the Result
- Which Channel Should You Actually Pick?
- Frequently Asked Questions
- Will changing my WiFi channel improve internet speed?
- Which WiFi channel is best in the 2.4 GHz band?
- How can I find the best WiFi channel without a WiFi analyzer?
- Should I use 20 MHz or 40 MHz channel width?
- Is it better to choose a channel manually or leave the router on automatic?
- Start With One Change Tonight
The Five Steps, in Order
- Check which channel your network is on right now and which band it uses.
- Scan nearby congestion with a WiFi analyzer app so you can see what channel every neighbouring access point uses.
- Pick the quietest of 1, 6 and 11 for 2.4 GHz, and the quietest block for 5 GHz. On 2.4 GHz use a width of 20 MHz.
- Log in to your router at 192.168.1.1 or 192.168.0.1 in a browser.
- Change the channel selector from Auto to your chosen number, save, and measure again to confirm it helped.
Most routers ship on channel 6 in Auto mode, which is why so many homes end up stacked on the same slice of spectrum.
What You Need Before You Start
You need a phone or computer already joined to the WiFi network you want to tune. You also need the password for your router admin page, which is printed on the underside of the router or in the manual.
A WiFi analyzer app is helpful but optional. Android phones can run one properly. iPhones generally cannot scan other channels, so if you are on iOS you will want to use your laptop for the scan step and your phone only to confirm the change afterwards.
The router address is almost always one of two: 192.168.1.1 or 192.168.0.1. If neither loads, the address is printed on the router label, or you can find it in your phone’s network details screen.
Changing the WiFi channel does not mean buying anything or replacing equipment. It does mean your devices will disconnect for about 30 to 60 seconds while the router applies the setting, so start it when nobody is in the middle of a call.
How to Find the Best WiFi Channel Step by Step
Step 1: Check Your Current WiFi Channel and Band
Start by finding out what your network is doing right now. On Android, open Settings, tap Connections or Wi-Fi, then tap the network you are connected to. The details screen shows the frequency band, the channel number and the signal strength in dBm.
A network showing 2.4 GHz will read something like 2412 MHz or 2437 MHz. A 5 GHz network shows higher numbers such as 5180 MHz. Convert MHz to a channel number by dividing the frequency by 5 and subtracting 50 for 5 GHz, or subtracting 2407 for 2.4 GHz. You do not have to do that arithmetic yourself if an analyzer app shows the channel directly.
There is one distinction that trips people up. The channel your router is configured to use is not always the channel it is actually using. In Auto mode the router may sit on one channel for weeks and switch later on its own. That is one reason to check, then switch to a manual channel.
Treat 2.4 GHz and 5 GHz as two separate networks with two separate answers. The quietest 2.4 GHz channel in a busy apartment tells you nothing about your 5 GHz band. Scan and decide each one on its own.
How it worked: you can read a channel number and a band for your own network, and you know whether the router is on Auto or fixed.
Step 2: Measure Nearby WiFi Congestion
Now scan the air around you. Each access point within range shows up as an SSID with a band, a channel and a signal strength. What you are looking for is the channel with the fewest strong networks on it, not the one with the least total networks.
A neighbour sitting at -40 dBm on a channel hurts far more than one sitting at -85 dBm. Channel 1 with three faint networks can still beat channel 11 with one very close one.
Here is the platform reality most guides skip:
- Android can scan every channel and band. Grant the app location permission, which is what the system requires for WiFi scan results. WiFi Analyzer and WiFi Analyzer by Alex Gault both show a channel graph.
- iOS will not give you a channel scan. The system only exposes the network you are joined to. Use a Mac or Windows machine for this step, or ask a router app that lists neighbours.
- Windows has Acrylic Wi-Fi, which shows channel occupancy per band, and NetSpot for a heatmap style view. WiFiAnalyzer by Alex Gault is a free open-source option.
- macOS can scan from the Wi-Fi menu in the menu bar. Hold Option and the menu lists each network with its channel and noise level.
Scan in more than one place if you can. The channel that looks empty in your hallway can be the busiest one in your kitchen, because walls and distance change signal strength. If you can, scan again in the evening, since neighbourhood usage tends to peak then. That is also why WiFi gets slower at night for people who never touched the router settings.
By the end of this step you have a list of nearby networks with their channels and strengths, and one or two candidate channels per band.
Step 3: Test a Less-Crowded Channel
On 2.4 GHz, only three channels matter. Channels 1, 6 and 11 are the non-overlapping ones at 20 MHz width. Every other 2.4 GHz channel bleeds into its neighbours, which is called adjacent-channel interference. Pick channel 3 and you land partly on 1 and partly on 6, so you collect interference from both without escaping either.
This is the part most routers get wrong by default. A factory-fresh router lands on channel 6 because it is the middle of the band, and in a building full of default routers that makes channel 6 the single most crowded channel in most apartment blocks. Channel 1 and channel 11 are frequently the quiet ones.
On 5 GHz you have far more room. The clean starting points are channels 36, 40, 44 and 48, which are non-overlapping at 40 MHz, and channels 149, 153, 157 and 161 at the top of the band. Users in dense areas often report 149 being the sweet spot because it sits outside the block most consumer routers default to.
The rest of the 5 GHz band is DFS, which means Dynamic Frequency Selection. Those channels are usually less crowded, but the router has to listen for radar for a minute or so before it can use them, and it may drop off if radar shows up. Fine for a stationary home network, irritating for anything latency-sensitive.
Do not test one channel and declare victory. Try two or three candidates, leave each one running for a day with normal household traffic, and keep the one that measures best.
You should now have a channel chosen for 2.4 GHz and one for 5 GHz, each picked because it was the emptiest of the options rather than because it was the default.
Step 4: Save the Channel and Verify the Change
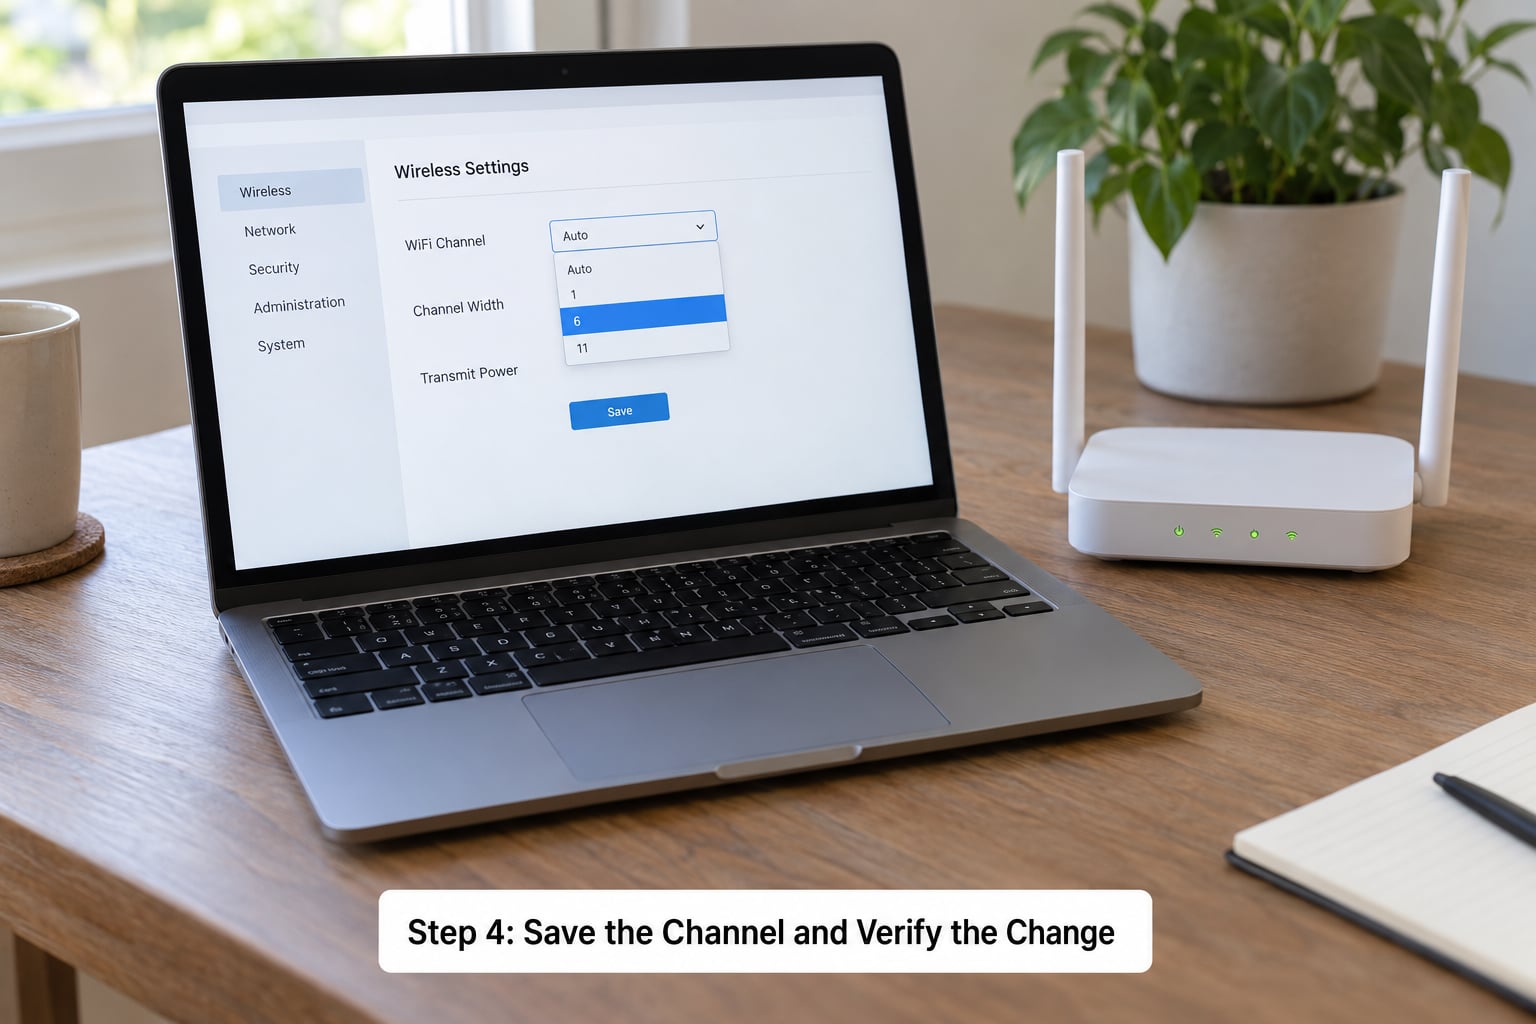
Open a browser, type 192.168.1.1 or 192.168.0.1, and sign in. Look for a wireless or Wi-Fi settings page, and for a channel field on each band. The label varies by brand: Xiaomi and Huawei typically put it under wireless settings in the mobile app or web interface, TP-Link under Wireless or Wireless Settings, Netgear under Advanced or Advanced Setup, and ASUS under Wireless Frequency in the WiFi radio section.
Set the 2.4 GHz channel to your chosen number with a width of 20 MHz. Set the 5 GHz channel the same way if your scan showed that band was crowded. Save, and let the router reboot if it asks. Your connected devices will drop and reconnect on their own.
Confirm the change by reopening the network details on your phone. The channel number should match what you set. If it still shows Auto or the old number, the setting did not stick and is usually down to a second SSID or band you did not change.
Measure before and after rather than guessing. Run a speed test and a ping test on the same device at the same time of day, once before you change anything and once a day after. Compare the ping time and the jitter, not just the download number. A cleaner channel rarely doubles your speed, but it can cut evening latency noticeably and it stops the stalls you were blaming on your internet provider.
Two things confirm the job is finished: your phone reports the new channel, and you have a before and after measurement on record.
Common Mistakes That Ruin the Result
Choosing an overlapping 2.4 GHz channel. This is the big one. Channel 4 sounds like a middle-ground safe bet and it is the opposite of that. On 2.4 GHz stay on 1, 6 or 11 with a 20 MHz width. If your router insists on 40 MHz on 2.4 GHz, drop it to 20 MHz.
Scanning from one spot only. Signal strength changes room by room. Scan where the router sits, where you actually use the network, and if you have an upstairs, up there too.
Confusing channel width with channel number. Channel 149 at 80 MHz uses 149, 153, 157 and 161 together. Wider is faster when the air is quiet and slower when it is busy, because a wide channel collides with more of your neighbours’ channels at once.
Changing the band by accident. Some router pages put channel and band on the same screen, and picking a 5 GHz-only channel on a 2.4 GHz radio silently does nothing. Check that you edited the radio you meant to edit.
Judging without a baseline. If you test once after the change and it feels the same, you learned nothing. Take a before reading first.
Beyond the channel itself, a few things move the needle more in real homes. Placement beats channel choice: a router on a shelf in a hallway will lose to a router on a cabinet even on a busier channel. Transmit power set too high adds more interference than it removes. And if you have more than one access point, a range extender or a mesh node, keep the extended bands three channels apart from each other.
Which Channel Should You Actually Pick?
Situation to channel, which is the shortcut most guides skip:
| Your situation | Band | What to pick |
|---|---|---|
| Apartment building or dense housing | 2.4 GHz | Quietest of 1, 6 or 11 at 20 MHz, plus channel 149 on 5 GHz |
| Suburban house, few neighbours | Both | Leave Auto, or 11 on 2.4 GHz at 20 MHz |
| IoT-heavy with smart home devices | 2.4 GHz | Quietest of 1, 6 or 11 at 20 MHz, keep the band clean |
| Online gaming and video calls | 5 GHz | 149 or 161 at 80 MHz, avoid DFS if stutters appear |
| Large house with an extender or mesh | Both | Plan three channels apart, 1 / 6 / 11 style spacing |
| Rural or few neighbours in range | Both | Auto is fine, channel choice barely matters |
One honest note on mesh systems. A mesh kit with a dedicated backhaul uses a separate radio between nodes, so the client-facing channels matter less. A kit with shared backhaul uses the same radios for traffic and backhaul, so channel planning matters more.
Frequently Asked Questions
Will changing my WiFi channel improve internet speed?
Sometimes, and usually less than people expect. A crowded channel slows down the link between your devices and the router, so a cleaner channel can cut latency and smooth out stalls even when your plan speed stays the same. It will not fix a slow ISP line or a weak signal across a thick wall.
Which WiFi channel is best in the 2.4 GHz band?
Only channels 1, 6 and 11 are non-overlapping at 20 MHz width, so the best one is whichever of those three has the fewest strong neighbouring networks in your scan. Routers ship on channel 6, which makes it the most crowded channel in most apartment buildings.
How can I find the best WiFi channel without a WiFi analyzer?
You can narrow it down without an app. Open your router admin page and try 1, 6 and 11 in turn at 20 MHz, leaving each one a day, and run a ping test in the evening on each. Whichever gives you the lowest and most stable ping time is your answer. An analyzer just saves you those three days.
Should I use 20 MHz or 40 MHz channel width?
Use 20 MHz on 2.4 GHz, always. The band only fits three channels at that width, which is what makes 1, 6 and 11 work. On 5 GHz you can use 80 MHz when the scan is clean, but drop back to 40 MHz in dense housing because a wide channel collides with more neighbours at once.
Is it better to choose a channel manually or leave the router on automatic?
Manual wins in dense areas, where Auto tends to land on the same popular channel everyone else picked. Auto is genuinely fine in a rural or low-density spot, where there is nothing to collide with. If Auto keeps switching channels during your gaming sessions, that switching is itself a reason to set it manually.
Start With One Change Tonight
Run a scan, pick the quietest of channels 1, 6 and 11 for 2.4 GHz at 20 MHz, set it manually at 192.168.1.1 or 192.168.0.1, and leave the 5 GHz band on Auto unless the scan shows the default block is packed. Then take a ping reading tonight and one tomorrow evening and see whether the numbers moved. That single hour of work solves most of the problems people bring to this topic, and most of them never needed to touch the channel at all.