Learning how to reduce blurry photos on a phone mostly comes down to four causes: a dirty or obstructed lens, autofocus landing on the wrong thing, a shutter that stays open too long in dim light, or a processing mode blending several frames together. Most people can restore sharpness in under five minutes, and none of the fixes cost anything. It helps to work through the causes in order, from the free ones at the top to the settings changes at the bottom.
The order matters more than it sounds. Cleaning the lens takes thirty seconds and solves a surprising share of cases, so doing it first saves you from fiddling with menus on a phone that simply has a smudge on the glass. Settings changes come last because they are the most disruptive to try and reverse.
If your phone was fine last week and is soft today, jump to step six first. Sudden changes are almost never hardware, and they are almost never your photography either.
Table of Contents
- What You Need
- Step-by-Step
- 1. Clean the camera lens and protective case
- 2. Switch to the main rear camera and check the resolution
- 3. Tap the subject to lock focus and exposure
- 4. Stabilize the phone and prevent subject movement
- 5. Improve lighting before increasing settings
- 6. Free storage and restart the camera app
- 7. Use editing to improve mild blur
- Common Mistakes
- Using digital zoom to get closer
- Wiping the lens with a shirt sleeve
- Shooting indoors with no added light
- Leaving night mode on for a moving subject
- Keeping the case and lens protector on while troubleshooting
- Over-editing a photo that cannot be recovered
- Frequently Asked Questions
- Why are my photos blurry all of a sudden?
- Why is my camera blurry even though the lens is clean?
- Why are my night photos blurry even with Night mode on?
- How do I turn off the background blur on portrait photos?
- How can I make a blurry picture clear again?
- Why do my photos look sharp until I post them on Instagram or WhatsApp?
- Conclusion
What You Need

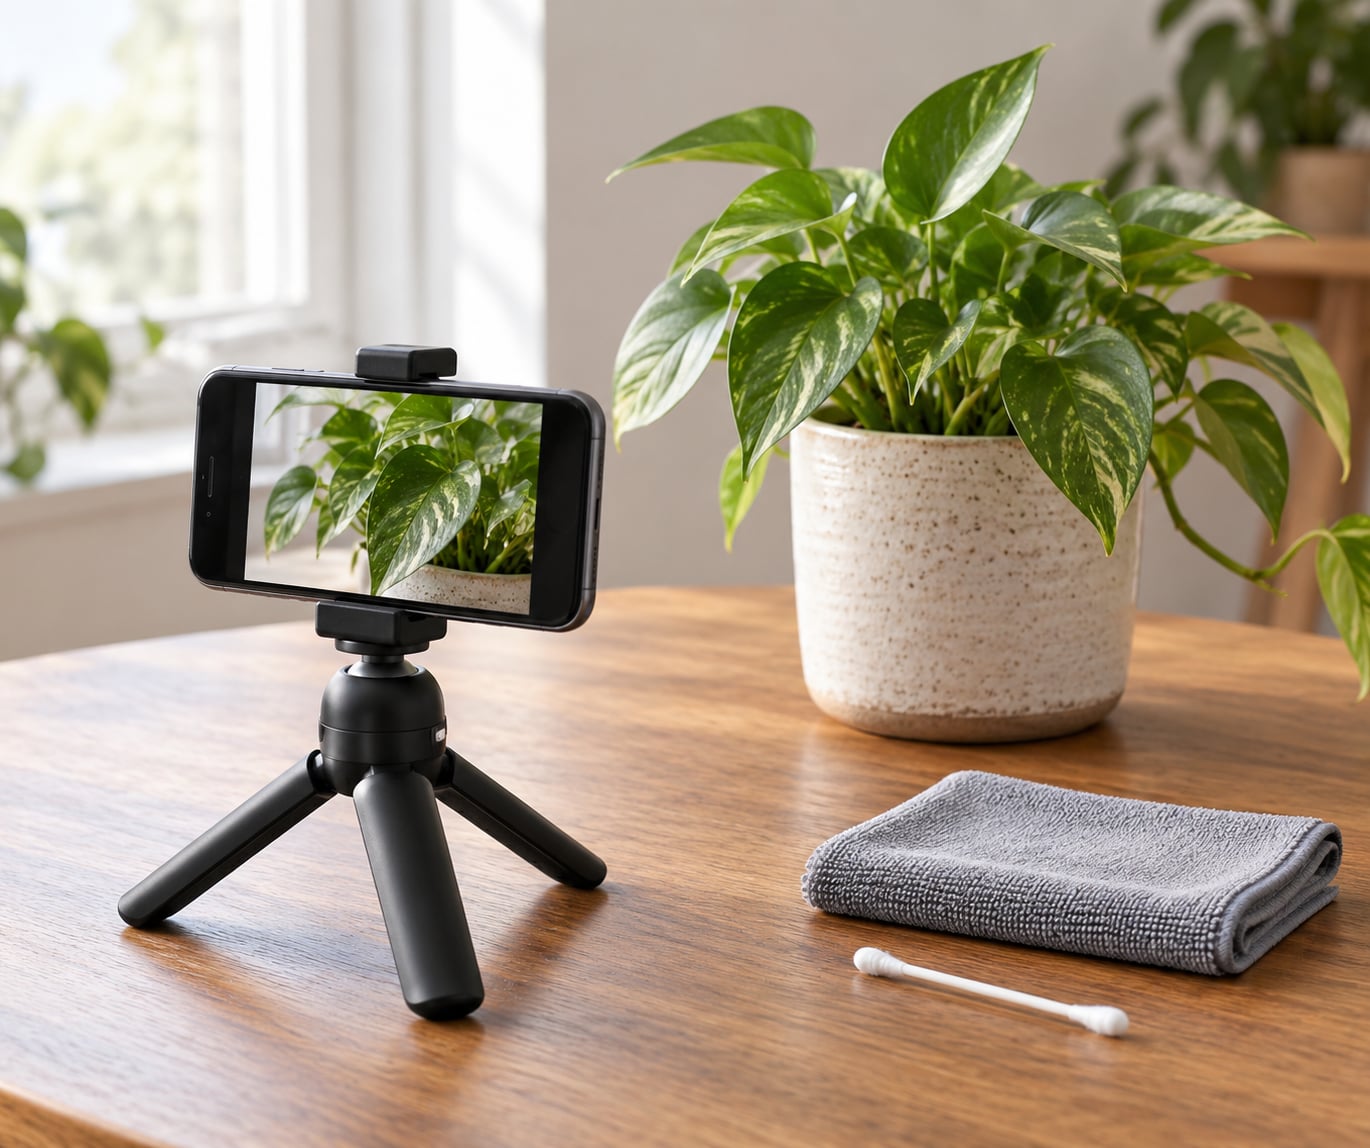
You need very little. A dry microfiber cloth is the one item that matters, and any soft cloth you already own will do as long as it has no lint in it. Grab a plain cotton swab too, since dust often sits in the seam around the camera bump where a cloth cannot reach.
Next, find somewhere with better light than where you usually shoot. A window, a lamp, or a bright ceiling light is enough. Blur that only appears after dark is almost always a lighting problem rather than a camera problem, and moving near a light source fixes it before any setting does.
You also want something to hold the phone still. A small tripod, a stack of books, or a mug that your phone leans against all work. For shooting people, a flat surface plus the self-timer removes your hand from the equation entirely.
Finally, free up some storage and know your editing options. Google Photos ships on nearly every Android phone and its editor is enough for mild softness. Snapseed, also free, gives you more control if you want to push harder. You do not need to install anything before you have cleaned the lens and tested the camera, though.
Step-by-Step
1. Clean the camera lens and protective case
Fingerprints, dust and a scratched protector film scatter light before it reaches the sensor, and the result looks like focus error rather than dirt. The lens sits in a recess that touches your pocket, your table and your hand every day, so a film of grease builds up fast.
Turn the phone off if you can, then wipe the lens with a dry microfiber cloth using small circular motions. Skip your t-shirt, sleeves and paper towel; the lint in cotton fibres and the scratches in paper towels are the reason a “quick wipe” makes things worse. Use a dry cotton swab for the seam around the camera bump and the flash.
While you are there, take the case off. Some cases sit a millimetre proud of the lens ring and cut into the frame at the edges, and a lens protector that has clouding or a lifted corner looks exactly like a soft photo. Xiaomi’s own support pages point at the protective film as a first suspect, so peel it and see.
How to tell it worked: text on a sign, a brick wall, or a sticker at arm’s length should look crisp at full zoom on the screen. If it is still soft with a bare, clean lens, the cause is somewhere else.
2. Switch to the main rear camera and check the resolution
Every modern phone has more than one rear lens, and they are not equally sharp. The 1x main camera gets the best sensor, the fastest autofocus and the most processing. The 0.5x ultrawide and any 2x, 3x or 5x telephoto depend on cropping or smaller sensors, and at the edges of the frame they soften noticeably.
People who fixed this themselves report dropping the zoom to 0.9x or below and finding the whole image sharpened. That is a real effect rather than placebo: a shorter focal length spreads the same pixels over less area, so edge detail survives.
Avoid digital zoom entirely. Pinching the screen to 2x or 4x just crops and stretches a smaller capture, and no amount of editing puts back the pixels that were never recorded. If you need distance, walk closer or use the optical telephoto, which samples the full sensor rather than cropping the 1x image.
Also check the aspect ratio and resolution setting inside the camera. A 4:3 capture uses the whole sensor; some 16:9 or 20:9 modes crop the frame and reduce the detail you get. On Xiaomi’s Pro and 50MP modes, a very high resolution can slow the shutter and reintroduce motion blur, so the standard 12MP mode is often sharper in practice.
How to tell it worked: compare the same scene at 0.5x, 1x and 2x. If 1x is clearly the sharpest, you have found your working lens and should stay there unless you need the wide view.
3. Tap the subject to lock focus and exposure
Autofocus is fast but not clever. It hunts between near and far looking for contrast, and in a scene with a bright sky behind a dark face, a phone will often settle on the sky. That produces a photo where the background is sharp and the person is not, which readers usually describe as “blurry” even though nothing moved.
Tap directly on the subject, ideally on a high-contrast area such as an eye, a white collar or an edge. A focus box appears; on most phones you can drag it up and down to set brightness. On iPhone, press and hold to lock both focus and exposure, which freezes the setting so the camera stops re-hunting when you move to frame the shot.
Watch the box. If it keeps pulsing or hunting, something in the scene is confusing it: a flat wall, a busy pattern, or a very shallow plane of focus. Step back half a step and tap again, or move the subject away from the background. On fast subjects, turn on the tracking autofocus option if your phone has one, so the box follows the person instead of staying where you tapped.
Phones with f/1.8 apertures have a very thin slice in focus, sometimes only a couple of centimetres deep. That is why a group photo at arm’s length can have three sharp faces out of five. Move back until everyone fits inside the focus zone rather than trying to fix it afterwards.
How to tell it worked: take a test shot before the real one, zoom in on the subject’s face, and check the eyes. You want a hard edge on the eyelashes, not a soft outline.
4. Stabilize the phone and prevent subject movement
Camera shake and subject movement produce two different kinds of blur, and both come from the same place: a slow shutter. In dim light your phone lengthens the exposure and raises ISO to gather enough light, and every movement during that longer window gets recorded. Your hand is moving, so the whole frame smears in one direction. A child is running, so only the child smears while the background stays sharp.
For shake, brace the phone against something solid: a wall, a fence post, a table edge. Tuck your elbows into your ribs rather than flaring them out, and breathe out before you press the shutter. Two hands on the phone, thumbs on the edges, beats one-handed every time.
If you cannot brace, rest the phone on the timer. Set a 3 or 10 second timer, put the phone on a flat surface at waist height, step into frame, and hold still for the second or two after it beeps. The timer delay is the point: it means nothing moves during the exposure.
For moving subjects, use burst. On Samsung, hold the shutter down to shoot a burst and pick the sharp frame later. On iPhone, press and drag the shutter down for a rapid-fire burst. If burst is not available, shoot a short video and pull a frame from it. One caution worth knowing: a Samsung moderator noted that Motion Timeline was removed in an update, so older advice about reviewing a motion photo to find a sharp frame no longer applies on current models; Single Take and Burst Shot are the replacements.
If you have hand tremors, put the work into stability rather than grip. A tripod or a firm surface plus the timer means no fine motor control is needed at the moment of exposure. Two-handed bracing and a 10 second timer is the combination that works when a single shaky press does not.
How to tell it worked: look at the edges of a static object such as a doorframe. Shake smears edges in the same direction everywhere in the frame; focus error only blurs part of it.
5. Improve lighting before increasing settings
More light is the single biggest upgrade available to a phone camera, because it lets the shutter stay open for a shorter time. Moving two feet closer to a window can halve your exposure. Turn on every lamp in the room before you touch a single setting.
Watch for backlighting. If the light source is behind your subject, the phone meters for the bright background, underexposes the face, and then lifts the shadows in post, which produces noise and softness. Turn the subject to face the light instead, or move yourself so the window is over your shoulder. That one change fixes more flat-looking indoor photos than any edit.
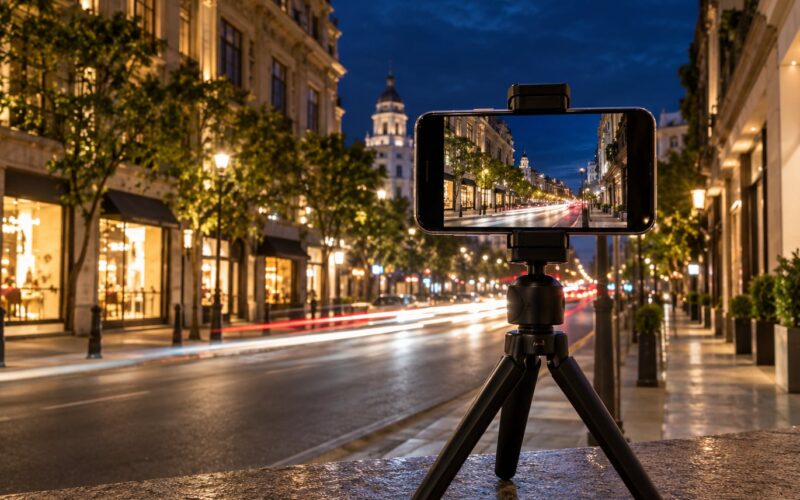
Night mode is the right tool once you have accepted that you must hold still. It captures several frames over a second or two and merges them, so any movement between frames becomes ghosting. It is a poor choice for a waving child and a good choice for a lit street scene with a phone on a tripod. Many users report that switching off the iPhone’s Prioritize Faster Shooting toggle under Settings > Camera fixed their low-light softness, because that setting trades exposure time for shooting speed. Availability depends on model, so look for it and test it with one photo.
Flash helps at short range in the dark and hurts at any distance, where it lights a dusty spot on the lens and leaves the subject dark. Use it for receipts and documents, and step back rather than firing it across a room.
How to tell it worked: compare a shot in the same spot before and after adding light. Sharper edges and cleaner shadows, with less grain, mean the exposure got shorter and you fixed the real cause.
6. Free storage and restart the camera app
When storage is nearly full, phones take photos slowly and process them later, and heavily used camera apps can lag badly enough that the shutter captures before autofocus has settled. That lag looks exactly like focus failure, and users often blame the camera when the storage bar is the real cause.
On Android, check Settings > Storage and see how much free space you have. To clear the camera app itself, go to Settings > Apps, find Camera, and choose Storage or Storage and cache, then clear the cache. On Samsung One UI the path is Settings > Apps > Show all apps > Camera > Storage > Clear cache. On Pixel it is Settings > Apps > See all apps > Camera > Storage and cache. Xiaomi runs the same idea under Settings > Apps > Manage apps > Camera > Clear cache, with a Reset camera settings option in the camera app itself, behind the settings icon in the top corner of the viewfinder.
Restart the phone afterwards. If blur began right after a system update, the camera app cache is the first thing to clear, because a corrupted cache survives app updates while a full restart clears everything in memory.
If it still looks soft, take the same photo in a different camera app. A manual control app such as Halide or Open Camera gives you control over shutter speed and focus and shows the image without the phone’s processing layer. If the same shot is sharp in the manual app and soft in the stock one, the problem is processing software rather than the sensor, and users have reported exactly that comparison after reinstalling an app. If it is soft in both, the issue is physical, the lens, or the scene.
One quick physical check: with the camera open and the phone held near your ear, give it a gentle shake. A rattle that is not the SIM tray or the volume key usually means a dislodged internal component, and that is a service visit rather than a settings problem.
How to tell it worked: the shutter should feel instant and the photo should appear in the gallery right away, with no processing delay before you can open it.
7. Use editing to improve mild blur
Editing is the last step, not the first, and it works far better on out-of-focus softness than on motion blur. Here is the honest limit: a photo smeared by movement has no recoverable detail, because the light from each point was spread across many pixels. Sharpening can make the smear look crisper without putting anything back, and heavy editing makes the grain and halos very obvious. Slightly soft, correctly focused photos improve a lot.
In Google Photos, open the image, tap Edit, then use the Sharp tool under the Adjust menu. Set it low, around 25 to 40 on a scale of 100, and check at full zoom. In Snapseed, the free app, use Tools > Details, raise Structure slightly and raise Sharpening more, then back both off until edges stop looking outlined. Both apps are free and neither needs a subscription for the sharpening tools.
Cropping can also help, because it removes the softest edges and the corners, where wide lenses fall apart, and it forces the remaining pixels to be displayed larger. A modest crop is a better trade than a heavy sharpen pass.
One last warning about the most common point of confusion. If your photos look sharp in the gallery and soft once they land in Instagram, WhatsApp or Facebook, the phone is not at fault. Those apps re-encode every upload and discard fine detail to keep file sizes small. Sending the full-resolution file, or turning on the setting that disables automatic compression in the app, brings the sharpness back.
How to tell it worked: zoom to 100% and look at a high-contrast edge such as lettering or a window frame. If the edge has a clean boundary instead of a soft halo, the amount is right. Back it off if you can see white outlines around dark objects.
Common Mistakes
Using digital zoom to get closer
Pinching the screen to 2x or more crops a smaller image and stretches it, and the result is soft before any processing starts. Walk closer, or use the optical telephoto lens, which reads the full sensor rather than cropping the 1x capture.
Wiping the lens with a shirt sleeve
Cotton fibres leave lint on the glass and can scratch the coating, which makes haze permanent rather than temporary. Use a dry microfiber cloth and a cotton swab for the seam around the bump, and never use a wet cleaner on the camera area.
Shooting indoors with no added light
Users often raise ISO or exposure to compensate for a dark room, which lengthens the exposure and guarantees blur. Add a lamp, move near a window, or turn the subject to face the light. More light is a better answer than a higher setting.
Leaving night mode on for a moving subject
Night mode merges several frames taken over a second or two, so anything that moves between them produces ghosting. Switch it off for people in motion, hold the phone still and use the timer for anything static after dark.
Keeping the case and lens protector on while troubleshooting
A case lip that overlaps the camera ring or a cloudy protector will soften edges even on a spotless phone. Take both off, take three test shots, and put them back one at a time so you know which one caused it.
Over-editing a photo that cannot be recovered
Stacked sharpening, high structure and heavy noise reduction turn a soft photo into a crunchy one. Keep the sharpening slider low, check at full zoom, and accept that a motion-smeared frame is not coming back. Shoot again with more light instead.
One more worth knowing: portrait and background blur is a different feature entirely. If you are trying to remove an unwanted artificial blur behind a person rather than a soft photo, that is a different setting, and the paths are Samsung Camera > Bokeh or Portrait off, Pixel Camera > Portrait off, Xiaomi Camera > Portrait off or switch AI bokeh to Depth effect, and on iPhone either leave Portrait mode and use the regular Photo mode or drag the Depth Control slider in the edit view down to Photo.
Frequently Asked Questions
Why are my photos blurry all of a sudden?
Start with the free checks in this order: clean the lens with a dry microfiber cloth, take the case and lens protector off, restart the phone, then clear the camera app cache. Blur that appears with no damage and no setting change usually follows a system or app update, and a corrupted cache survives the update. A loose internal component or a cracked lens cover the remaining cases.
Why is my camera blurry even though the lens is clean?
A clean lens rules out only one cause. In low light the phone lengthens the exposure, and your hand moves during it, which smears the whole frame. Autofocus may also be locking onto the background instead of your subject, especially with a bright sky behind a dark face. On fast f/1.8 lenses, only a thin slice of the scene is in focus at once, so moving back a step fixes it.
Why are my night photos blurry even with Night mode on?
Night mode works by capturing several frames over a second or two and merging them, so it needs a completely still phone and a still subject. Hand movement shifts every frame slightly and the merge produces ghosting rather than a sharper result. Put the phone on a tripod or a flat surface, use the 3 or 10 second timer, and turn Night mode off entirely for anything that is moving.
How do I turn off the background blur on portrait photos?
It is a per-brand setting, and it is separate from the blur that comes from focus or shake. On Samsung open Camera and set Bokeh and Portrait to off. On Pixel, open Camera and turn Portrait mode off. On Xiaomi, open Camera, switch Portrait off, or move AI bokeh back to Depth effect. On iPhone, stay in the normal Photo mode, or open the edit view and drag the Depth Control slider down to Photo.
How can I make a blurry picture clear again?
Open the photo in Google Photos, tap Edit, choose the Sharp tool and set it to about 30 on a scale of 100. Snapseed gives more control through Tools, then Details, where you raise Structure and Sharpening slightly. Crop out soft edges as well, since cropping removes the worst part of the image. Keep the values low: sharpening helps mild out-of-focus softness and cannot recover detail from motion blur.
Why do my photos look sharp until I post them on Instagram or WhatsApp?
Those apps re-encode every photo you send and discard fine detail to keep file sizes small, so the copy you receive is softer than the original on your phone. This is compression, not camera blur, and no setting on the handset will change it. Use the full-resolution or original-quality upload option inside the app, or crop tighter before sending so the remaining detail survives the re-encode.
Conclusion
Run the cheap checks first, in this order: clean the lens with a dry microfiber cloth, take the case and any lens protector off, switch to the 1x rear camera, and tap the subject to lock focus and exposure.
Then hold the phone steady, add light rather than raising settings, free up storage and restart the phone. Only then reach for sharpening in Google Photos or Snapseed, and keep it low. If a shot stays soft through all of that on every lens and in a second camera app, the cause is physical, and it is time for a service centre rather than another settings change.